
Have you ever lived in a house without water? It’s difficult and inconvenient. It’s even harder if you run out of water in an RV.
If you suddenly find yourself trying to find the problem in your RV’s water system, maybe it’s time to check your RV water line.
The piping arrangement may look like a maze for beginners, but don’t fret! We’re here to help. All you need to know is how to remove RV water line clamps. Knowing this skill can save you from a lot of stress.
What RV Water Line Clamps Are For
Since RVs are basically mobile houses, you’ll need essentials like water and electricity. This is where RV water line clamps come in.
RV water line clamps secure your pipes for water distribution. They usually come as rings in various sizes. They also attach to tubing pipes made out of cross-linked polyethylene or PEX.
PEX pipes are the most common material for RV pipes today. Not only are they affordable, but they’re also flexible.
When to Remove RV Water Line Clamps
There are different reasons as to why you may need to remove RV water line clamps. The most common reasons are faulty and old pipes.
So, if you’ve had your RV unit for years and there’s a problem with your water system, it may be time to check your pipes.
If you’re also getting unusual water flow in your RV, there may be water leaks that you need to attend to.
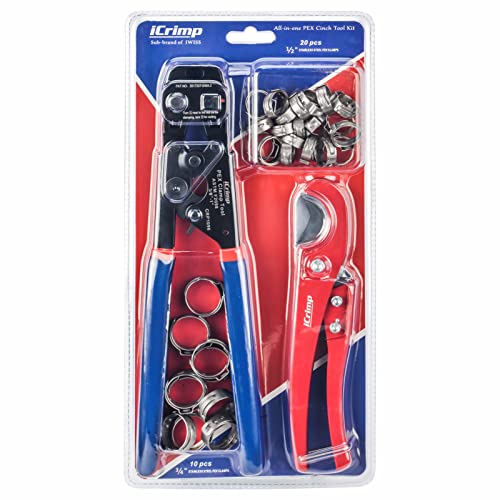
When removing RV water line clamps, make sure that you have the right tools. This will depend on the rings connected to your pipe.
If your pipes have clamps, you’ll need a clamping tool. The good thing about this system is that you’ll only need one tool regardless of the size of your pipe.
For a crimping system, use a crimping tool. You may need more than one crimping tool if you have multiple pipes in various sizes.
How to Remove RV Water Line Clamps
Removing RV water line clamps is pretty easy. You can do this in seven easy steps.
Step 1: Access Your Pipes
The first step is to access your pipes. Most water pipes are placed just below your RV floor along with the water tanks.
Simply remove the floor panel leading to the lower flooring section to gain access to your pipes.
Step 2: Clean Your Pipes
To clean your pipes, make sure you’re near running water. This will help you clean them faster and more efficiently.
Next, run your hot and cold water through the pipes to clean the insides. At this point, it’s also good to check whether or not you’re getting enough water pressure.
Step 3: Turn Off Your Water Supply
After cleaning your pipes, turn off the water supply. Make sure that no water is still in the depressurized area where you’ll be working.
Step 4: Remove Your RV Water Line Clamps
Using the pipe cutter, cut a portion of the pipe out of the system. It’s important to cut far enough from the fitting. This can help you remove the barbs faster later on.
Then, pull the metal knob down on your ratchet tool to switch it to cutting mode.
Place the tool on the clamp ring and trim. Once trimmed, you can easily slide the clamp off the pipe.
Another way to do this is by loosening the clamp covers with a flathead screwdriver. The flatter the head, the better.
Twist in between the clamp lock carefully. Once the clamps are loose, you can now slip them off the pipe.
Remember not to misplace any of the clamps since you’ll need to reconnect them later.
Step 5: Remove Your Pipe From the Barb
Carefully remove your pipe from the barb. To do this, gently rotate the tubing back and forth until it becomes loose.
If your goal is to just remove RV water line clamps, you can stop at this step. However, if you want to learn more about your RV plumbing system, then, read ahead.
Step 6: Reattach Your New Water Line Clamps
Reattaching your new water line clamps is simply the reverse order of removing them.
First, make sure that the ends of your pipes are free of debris. You can do this by cutting the pipe using a pipe cutter. It’s recommended to cut at least 2 inches from the old connection.
Then, slip the new water line clamp onto the pipe and use your clamping tool to secure it. It should fit flush with the pipe.
Step 7: Inspect Your Water Line Plumbing
Once you’ve placed back the pipe from where it was before, it’s time to inspect your water line plumbing.
Make sure that all pipes are connected without spaces or gaps to avoid leaks.
Types of Water Line Connection
Connecting your RV water pipes can be done in two methods: the clamp system or the crimp system.
Both systems use rings to ensure that water doesn’t leak through your pipes. The two most common rings are stainless steel clamp rings and copper crimp rings.
Stainless Steel Clamp Ring
The stainless steel clamp ring is one of the go-to water line clamps for PEX pipes. It’s more resistant to corrosion than crimp rings.
Stainless steel clamp rings are also easy to remove. With the appropriate clamping tool, you can compress the rings even with pipes in different sizes.
Copper Crimp Ring
Copper crimp rings are one of the oldest and most reliable rings for PEX pipes. They provide full compression over the barbs of the fitting.

Using copper crimp rings, you’ll also avoid common pipe problems like expansion or corrosion.
Although it’s a little more complicated than simple clamps, you can rely on the crimp system more in the long run. Simply use the Go-No-Go gauge to test whether your pipes need adjustments.
Final Thoughts
Living in an RV is fun until you encounter some piping problems. Piping problems can be hard to solve, especially if you have no knowledge of the right skills.
But now that you know how to remove RV water line clamps, you’ll be able to fix water problems in your RV in no time!